03 September 2012

Update: my green sweater WIP

You're looking at the stitch markers
I'm pushing along on my sweater and have the back and front done above the armpits, but I've also gone ahead and connected under the arms and I'm now going down the front completely in the round!

Exciting things that have happened include:
  1. Adding stitch markers under the arms, which I sort of find adorable. I have some very utilitarian ones, but also a pretty pearlish one that I got when I purchased my shawl pin. Cute and pretty!
  2. I connected and am now knitting in the round! This might seem straight forward to some of you, but to me this is a new and exciting thing. I now have an infinite tube of sweater that I'm making. I don't have to turn needles or move my sweater around. I don't have to purl. I just knit knit knit and around and around I go.
  3. I have well over 3 inches of fabric (under the armpits) done! Whoa! So fast! I won't start any more decreases or shaping, though, until I hit 5 inches.
  4. I've switched needles down a size! I was using a pair of size 7 circs that I bought at joanns, but now that I'm down to size 6 I pulled out the Knit Picks nickle-plated tips and cord that Polycrafty let me borrow, and I freaking love it. They are pointy, they are easy, they are fast. Zoom!
But... some disappointments as well:
  1. Remember how I'm just knitting forever in an infinite tube? Well, as it turns out, that gets a bit boring after a while. *yawn*  I don't wish I was smaller all too often, since I'm generally happy with myself, but I wish I was several inches smaller circumference and then I wouldn't have to many stitches around to do.
  2. Also, this yarn is obviously too thick for this top. I think it will come out an OK size, but just be too bulky for the sweet little look that it has in the picture. I wanted to save money on something I might not finish and I went with mid-grade yarn cost. In retrospect, I wish that I had picked up what was recommended.  Maybe I'll pull all of this work out and make something new?  No way. I'll at least finish and wear it once.  After that? We'll see if I end up falling in love with it, after all.

29 August 2012

FO: Swirl Shawl for Work

The whole shebang
It's finished!!   The last time I wrote about my Swirl Shawl,I was concerned about it being too small since I didn't have the required yardage, I changed up the needles that were called for, and I guess I was worried that it was going to be a disaster.

Guess what? I think it's absolutely fabulous!

Here it is looking a bit like a croissant with the curly ends.

Dangle! Twisty
And here it is as worn - with wispy little tendrils that dangle down on one side since it's tied up with a pin (they dangle on both sides if I even it out and let it hang). 

I've worn it to work twice already and I think it looks nice, though calls to mind a question:

Close up and personal, Silk Mohair Lace
Should I be worried that I'm so soon an old lady, at the young age of 29?

This was easy and fun...

Though once I learned how to do a yarn-over it got a bit boring.

26 August 2012

Finally done: Drippy Wax Art

Melty crayons are melty!
Several months ago, when I used to use Pinterest, I saw an awesome melty-crayon wax project that I just had to recreate.  I wanted to make something to match my living room - dark wood, teal and tan couch and cushions, brown and tan brick. I started buying about 10 boxes of crayons. And a 2x4 ft canvas.  And I was ready to go!!

Ha! Just kidding. See, I wanted to sort out the colors that I didn't want (reds, pinks, oranges....) and just keep the colors that I did (teal, some greens and blues and tan).  So 10 boxes got me approximately.... 8 inches across the total 4 feet.

So I bought crayons whenever I saw them on sale in whatever craft store I was in. A few months and several pounds later.... I had enough crayons sorted and ready to go.
Close up arty shot

With the help of super glue (hot glue gun didn't hold once we started heating), plastic tarp, and a heat gun, I present melty crayon art!

Nathan and I team-peeled the paper off of all of the crayons by slicing the paper lengthwise with a razor and peeling the paper quickly.

We spent a long time lining up the crayons and adding highlights and low lights and shifting things around back and forth and making it just *so*...

We super-glued them all down and blasted them with hot air and let them drip down.

Fabulous success. Now I just need to resist the urge to touch it and pick at it.  Good so far!

14 August 2012

Spoiler Alert

A pic of empty needles and leftover yarn can only mean one thing.... stay tuned!


12 August 2012

Swirl Shawl in Mohair

Fluffiest shawl ever.
Since I had a few questions about the sweater I was working on, I decided to cast on and try my hand at a quick n' easy shawl, the Swirl Shawl. I was a little concerned because I was planning to use the skein of Rowan's Kidsilk Haze that I picked up in Medina at a cute little shop, Studio Knit (warning, music), but the pattern called for a much heavier weight yarn.

The pattern also called for more yardage than I have... I only picked up one skein and to fit the pattern I'd need about 1.5. The shawl is constructed starting with the neck area, and then it's knit in a semi-circular rows back and forth, increasing stitch count each time. Due to the construction, it's pretty easy to change the size and length of the shawl by using more or less yardage, so I decided to just go until I run out.

Another change: I started the first few inches with the needle size called for, but then I switched to a much larger gauge so that the whole thing would move along a little more quickly, and also so that the shawl won't be as warm (due to less of the fluffy, insulating fiber). 

The tricky part is that I'm not a very good judge of how much yarn I need to do each row and how much I have left total. Mohair is a pain in the neck to frog/undo, so I want to be careful that I have enough to do my final finishing rows ... but still trying to use all of the yarn since my little shawlette might be on the small side. My yarn is a dark-ish slate grey and super fluffy, and it's been tickly to work with.

The good news is that I think it would be relatively easy to pick up stitches along the outer edge, if needed, if once I finish and cast off and block I decide that the whole thing is too small. It would require finding some extra of this yarn... but even purchasing an extra fresh ball won't be too bad....

I just want to finish and block so that I can wear this to work, already!! I'm about 90%....

04 August 2012

A neck for my sweater

My sweater has a neck hole!
I've started down the front of my sweater, so now I have a neckhole where my head can go!  As you can see in the pic, I picked up the stitches at the top of the shoulders and started knitting down the front. The little holes at the shoulder are intentional - when I'm done knitting I'll fold these over and sew them down and it will create decorative folds/gathers to make the top look drape-y. I was a little concerned that the neck wasn't big enough, but it fits over my head fine and I can't wait to get a little bit more done so that I can try it on more easily.

Progress is progress!

Add caption
But, at the same time, I found that I've made an error. Somehow, I've knitted a hole into my fabric. I don't know how on earth it happened, but it's on the front right side (as worn) directly under the neck. Since the pattern is written for the stockinette to curl down to create the neckline the hole is actually hidden, so I am trying to debate if I should pull out all my work and go back and fix it, or if I'll just let it slide. 

I did some reading on the internet, and apparently it's common for beginners to introduce YO (yarn-overs - it's an increase) into their knitting and that leaves a hole... but it also adds a stitch. I counted and have the same and correct number of total stitches, so I sort of have no idea what I did.

Thoughts?

29 July 2012

My first increase!

The top back of my sweater! From neck to armpit.
So, you may remember that I worked on swatching with the yarn and needles I bought to make a sweater and I learned how to purl correctly and fixed the wrap direction for my knit so that my stitches weren't twisted.

This weekend my progress has continued, and I spent several hours working on the first section of the pattern. This sweater is worked from the top down (so you can try it on in process) and once I get under the armpit I'll connect in the round and go down the midsection.  On the pic here, you can see the back of the sweater, and the top droopy portion is the neck. The next step is to pick up the stitches at each shoulder with the needles and to start knitting down the *front* of the sweater.

Increases! KFB!
I also learned something new: how to increase stitches! You might notice that along the armpit area the piece flares out. You might suspect that it's due to wonky technique, but it's actually on purpose. I was increasing the number of stitches by doing to kfb that adds an extra stitch to the needle.  Here's a close up, so you can see where I'm adding the extra columns.

While it feels awesome to learn this new stitch and to kfb - they are sort of fun - with each added stitch is just a bit more work I have to work going forward.

This sort of makes me think I'd like lace since there are all sorts of stitches that aren't just knits and purls.

22 July 2012

Untwisting the Purl

I don't ever want to make another swatch. Ugh, learning!
Today, I went to my friend's home for some trashy TV on Netflix, some Rustic cheese, baby green, and nasturtium sandwiches, and some Mega Craft Time.  In addition to spending a few hours knitting the ugliest scarf ever while watching Hoarders, I decided to figure out, fix, and learn how to knit and purl properly so that my stitches weren't twisted.  To show you what I mean, check out this picture:

Basically, if you follow the stitches carefully starting from the bottom and working upwards, you see that the knitting looks like a row of little V shapes. Every other row, though, the "V" shape looks more like a "Y", since the bottom of one stitch crosses the bottom of the next. A proper stockinette should have all of the slanty-lines of the V line up, but not cross, to make the correct shape.  I've highlighted a few rows on the bottom showing the cross on the 'purl' row, and then higher up you can see where I've corrected it by wrapping the yarn the proper way around the needle when I'm purling (basically, wrap counter-clockwise instead of clockwise... who knew?)

Peppery nasturtiums! Flowers are delicious and fancy.


Ta da! Now that I have this straightened out, I decided to cast on and start the first 3 rows of my sweater :) I didn't take a pic, though. Instead, I'll leave you with this one from the lunch I had with Polycrafty.

17 July 2012

Homework.

Today I lovingly handcrafted my homework for the week: some review and problems from the book and also two labs. I've been learning about HTTP, DNS, and also using Wireshark for packet sniffing. As you can imagine, jokes and multiple-entendre about what sort of packages I'm going to sniff* abound.
The good news is that this is my last class. The other good news is that I love this professor and TA. I can't imagine people I'd rather learn about networking and computers from. Here's the thing: I think this stuff is interesting!! I like this class and these homework questions and the homework and reading the text and watching the lecture! I haven't even skipped anything yet.

* Also embedded objects.

14 July 2012

A proper swatch

Blocking with pins! Like a proper swatch.
After my last post, I decided to do a proper swatch. I used garter to make a 'frame' that would keep the stockinette swatch portion from curling and twisting. When I was finished, I washed it gently and blocked it to let it dry overnight.

Dried swatch.


Good news! My stitches per inch is as the pattern calls for.


Bad news! Looking at my swatch it looks like my knitting is twisted a bit (or maybe my purling is?) Instead of the "V's" lining up next to each other, on every other row the row is very short and one side of the V is tucked under the other side.

I think that it might make sense for me to wait to cast on until I get some input on this. Though usually I'm all "this seems close enough let's go!", I sort of what to do this -right- so that I wear it when I'm finished.

Thoughts?

12 July 2012

Swatching and a Moscow Mule

Ok, so let's get the most important out of the way first. Inspired by a boardgaming friend of mine, Nathan and I selected the Moscow Mule as our Cocktail of the Week and decided to mix them up for friends as we played games tonight.  First, this drink is delicious. Second, this drink is refreshing and perfect for a hot night. Third, it's easy (well, provided you can find ginger beer.)

Shake together vodka and lime juice (2:1) over a bunch-a ice and serve on light rocks in a highball glass. Top with Ginger Beer - not ginger ale soda! - (2-4 parts, or whatever tops up your glass).  Drink the crap out of it. Be refreshed.

Now that everyone is a little fizzy, I've started swatching for the Magnolia sweater that I'd like to make for myself. I ordered some wool + silk blend yarn from KnitPicks in a grassy green color and it showed up today, so I couldn't help but start swatching.

Look at this! 10 stitches across 2 inches.
The purpose of a gauge swatch is to make sure that using your particular yarn with your particular tension on your particular equipment (needles!), you can create the same sizes. If you do this and adjust at the beginning, you can make a sweater that fits -you- rather than your favorite stuffed animal or Great Aunt Mildred. Despite the benefits, I've never actually swatched before because, boring, and also because I've been making dishcloths and who cares?

But I did it!! The number of stitches per inch across a row is perfectly on target for the pattern, 20 over 4 inches (5 spi)... but my stitches appear to be squat and shorter... either 6 or 7 stitches make up a vertical inch.  Before I go any further and cast on I think that I'll wait for input from more more experienced knitters, but in the meantime I'm really proud of myself.

I've also starting knitting the correct way - knitting into the front of the loop rather than the back of the loop. Ta da!

08 July 2012

Kitchen Curtains

Upholstered cornice, completed, and hemmed panels.
The window over our sink in the kitchen has exposed plastic conduit for wires and things that Nathan really hated. He asked me to make up some curtains, so we plotted about what style and type would look best for the space and what would actually be reasonable to make.

We went to Joann's and looked at some books about making window treatments and decided that we wanted to use a cornice with some panels hanging on the sides. There were some make-your-own kits, but they were crazy expensive. Since the window was small, we didn't need anything elaborate or extravagant so we decided to make our own basic panel from scratch.

Nathan made a simple rectangular cornice form out of old wood (plywood) from the garage and just used some batting and a staple-gun to softly upholster the blue & white fabric we chose. I had some old white & taupe striped breezy fabric leftover from making curtains for my bedroom when I lived in St. Louis in the 2004-2007 time frame. The panels I had were already cut and even hemmed on one side, so I just game a quick hem around and cut them to length.

Et voila! Except they aren't yellow in real life.
Since we wanted to keep the length of the curtains flexible in case of moving to a new place, etc., we didn't actually hang the panels from a traditional curtain rod, instead we left them as big rectangles and used hidden hooks inside the cornice to baste the panels at the correct height to the wood itself. If we move, we just snip the thread and can iron and re-hang at the best height. This also allowed us to bunch the curtains in the corner/edges of the cornice to make sure that we were covering up the conduit that Nathan hated... we didn't care if we could close the window, this was just decorative camouflage.

They've been hanging a few weeks and we love them!


07 July 2012

Mistakes - fix 'em or forget 'em?

Yesterday, I brought my knitting with me to boardgaming night at the BURPS HQ. After a few games I decided to take a break and just knit a bit while friends (including Polycrafty) continued playing.  I had knit several rows and took a look back at my work and there was something... missing.  Rather than continueing the stripey bands that make the dishcloth look like so many stacked bricks, I had somehow dropped this section and sort of knit over it.
I guess this is what it's like to do my best.

I paused a bit and dug into my knitting with the spare needle and found the stripey part, but somehow I had knit right over it, covering it up and ruining the effect.  Usually at this point I'd just shrug and keep going, but I had already prided myself on how I hadn't even made any mistakes yet (that I noticed...) and has shown such improvement. 

Anyway, I yanked out a few rows and kept my place and re-threaded the thing on my needle and realized that I was forgetting to pull the yard forward and back before slip stitching, and it resulted in me covering up my hard work. But I undid my mistake! And I figured it out! And I fixed it!

This isn't typical for me.  And now I'm even further than before.

05 July 2012

Ballband: Take Two

A few weeks ago, I received a package from my mother. As it turns out, she picked up on my not-so-subtle hint that I'd be happy to take any old knitting supplies off of her hands... and she came though in flying colors. She had 7-8 pair of needles in the box, most of them rather old since they belonged to my Oma but a few newer pair as well that my mom picked up. These was even the start of a sleeve on a tiny set of double-pointed needles with a ribbed cuff that went about a third of the way to the elbow -- this was something that my Oma was working on at some point. The stitching was really lovely. My mom also threw in some Twizzlers and Starburst since they wouldn't melt in the heat.  Atta girl!

My mom's ballband dishcloth. Blue!
Anyway, in order to get my mom to ship the package out, I resorted to bribery* and offered to make her a dishcloth to match her kitchen. She selected a dusty blue, and since my size 7s were empty, I cast on while watching Iron Man to celebrate the 4th of July and by the end of The Incredible Hulk I was about 1/4 of the way through (including a nice break for dinner... ribs on the grill).

Already, this piece is much nicer than my first go, and I don't think that I've even made any mistakes yet. The rows are more even, the whole thing is at a more balanced tension, and I'm pretty happy with how it's coming along. Give me a few more hours and I'll have this one knocked out of the park, too.

I like the feeling of finishing things!! I fear what might happen when I start something a little more lofty, like a sweater, since that will take hours and hours and involve lots and lots of mistakes.  Hm.  We'll have to see how this plays out.


* I'm pretty confident that my mom didn't actually need to be bribed.

04 July 2012

Finished! Nathan's Fingerless Gloves

Button-pushing can reduce blood circulation
They are finally finished!
Today, in the comfort of an air-conditioned room, I finally finished knitting and then seaming Nathan's fingerless gloves.

I learned quite a bit along the way, not the least of which the importance of counting rows and also the importance of not just changing things a bit so the length adds up. (I had 2 rows of knit, followed by 4 of stockinette on the 2nd piece, but since it was a little longer than the 1st piece I decided just to knit one row before starting the stockinette.... and so I have the dashes ----- of purl on the right side of my piece instead of VVVV's from knitting.)

In general, the 2nd piece looks a lot better - more even and slightly looser stitches and more control... with the exception of my personal modification, above.

I used mattress stitch to seam these up and pulled about 2 columns in to make them a little tighter.  When I cast on, I added 4 stitches to make them Man Sized, but when all was said and done they didn't have the negative ease required of a stretchy wearable.

Nathan says he likes them.... so yay! Birthday present and/or Christmas present!!

02 July 2012

Ice Cream: Coconut cherry rose

Coconut, Cherry, & Rose Ice Cream
Oh, Summer... one of the best things about this season is that cherries go on sale. Sometimes, in the memories from childhood, they are as chap at 99-cents-a-pound. Othertimes, though, like last week at Marc's, they were $1.99/# and that's almost as good.  Also: I never need an excuse to make or eat ice cream, but if I needed one then Cherry Season is it.
Mid-layering
Several years ago (Ahem: 2009) I found a recipe on Tartelette's blog for Cherry, Rose, and Coconut Ice Cream and I've been making it at least annually ever since.

I'm not going to post the whole recipe here since I don't even adapt her recipe (I just copy it outright) since it's so freaking delicious.
Layered and ready for the hard-freeze

I will leave a few tips:
- It is always appropriate to mix 1 cup each of sugar, cream, milk, and coconut milk and warm it up until the sugar dissolves and then to freeze it. And eat it.
Our cast!
- If you make this, make sure you use food-grade rosebuds. I last picked them up (for really cheap, honestly) in bulk from the Food Co-Op on Euclid near Mayfield... but now that the location's closed I don't know the next place in the area to look. Whole Foods? Mustard Seed Market?  Gosh... what am I saying...  just order it online.


Holy Moly. So delicious. Fresh, sweet cherries w/roses and sugar.

14 June 2012

Dinner: BBQ crockpot chicken & slaw

Last night I made dinner. I had BBQ pulled chicken in the crockpot, macaroni and cheese from a box (natch... the kind with a cheese sauce packet, for Nathan, even though I prefer the powdered kind), vinegar & oil coleslaw, and some slices of homemade bread to make sandwiches.

Delicious.

No photos, because I forgot. 

Worst post evar? Maybe... but I wanted to keep some sort of rhythm.

09 June 2012

Halfway there: N's fingerless mittens

Yesterday I had my only final for the Spring Term. It was online and there were true/false, a few short answer, and some multiple choice. I studied hard and think that I did well, but I'll have to wait and see. In addition to this, I worked on homework assignments and team paper writing and more studying... gah!

After all that work I needed a break!  Fortunately, I had my beloved Netflix subscription and a documentary that I've been wanting to see, Word Wars, was available!  What does this have to do with anything lovingly handcrafted, you might wonder?

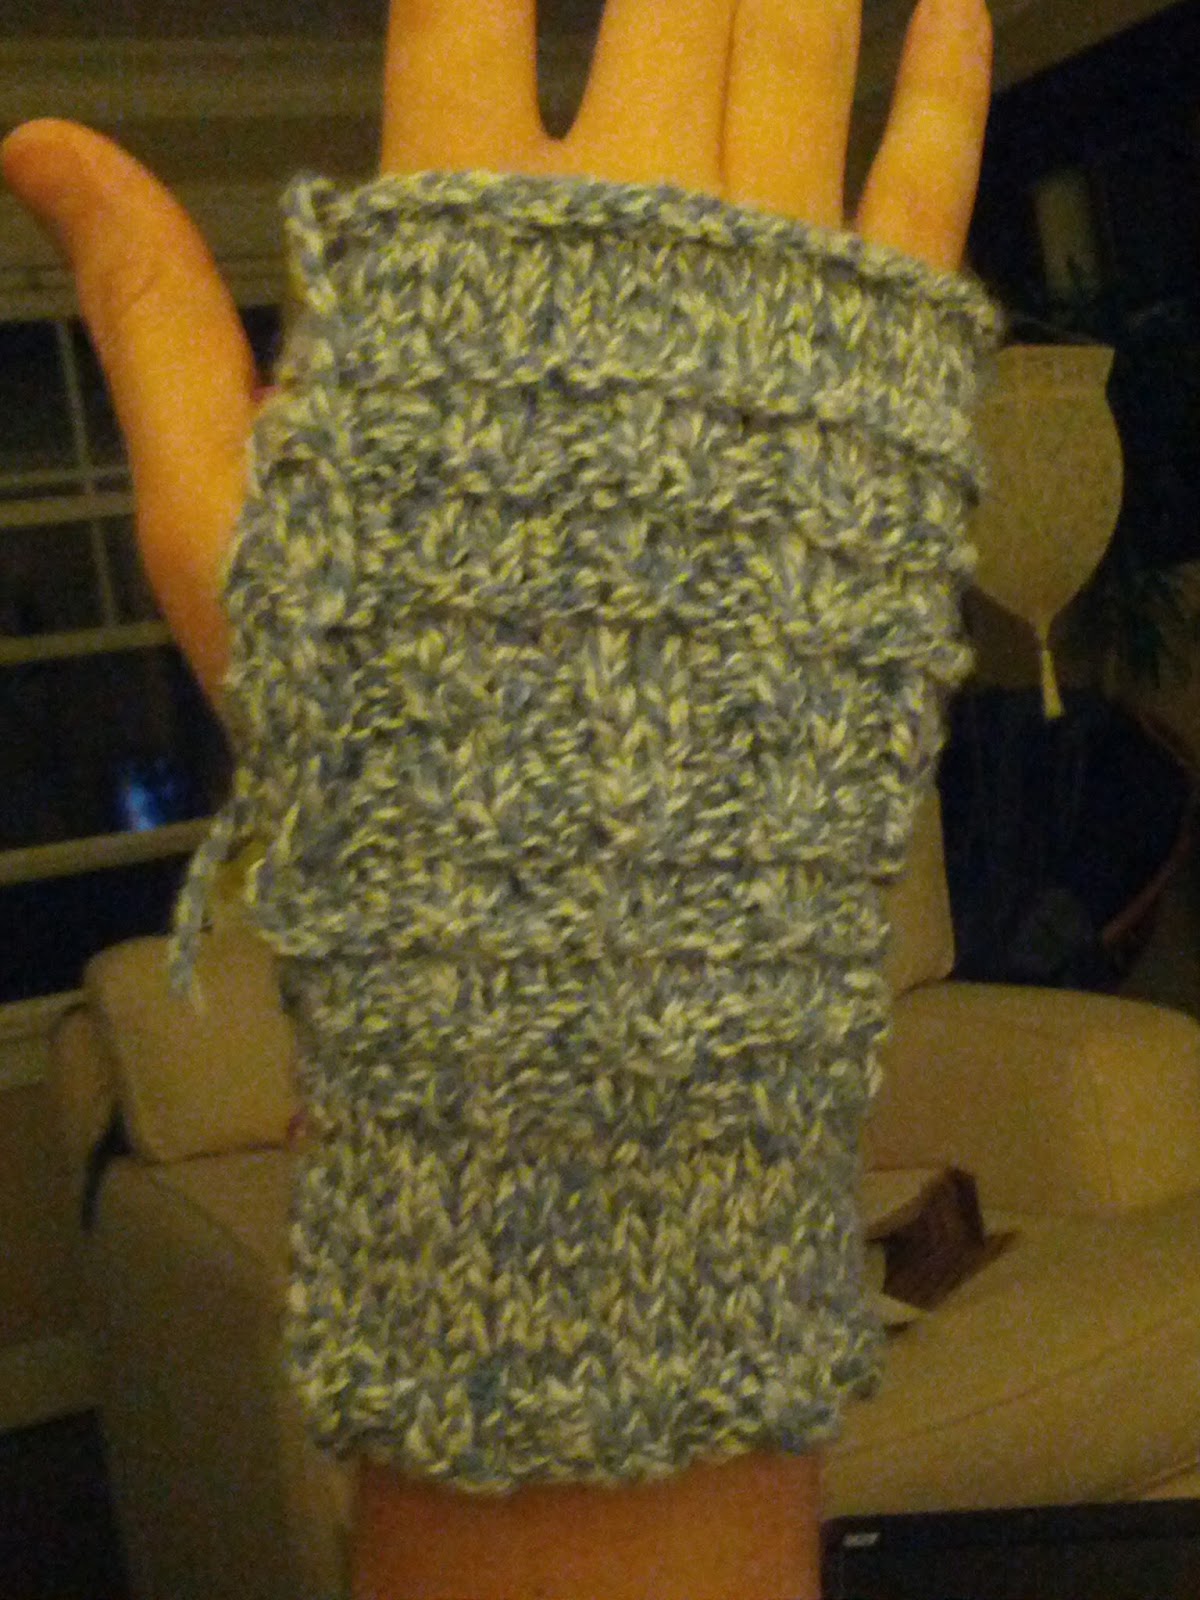
A fingerless mitten! Pinned up the side for testing.

This!

I finished the first of two fingerless mittens for Nathan. Now, this one is just pinned together up the side to check the size so it's not finished.... but I'm so happy and it looks great.

It has a few rows of waffle-y stitch at the bottom with a stockinette cuff, then more waffle for the main hand portion and it it topped with a little stockinette band at the fingers. 

I'll wash it, block it, then sew it up the edge leaving room for the thumb and then I'll get to start a new one.  The big question: should I cast on the 2nd piece now... or wait until I make my momma a dishcloth in blue? 

Decisions, decisions.

06 June 2012

Sewing: Sweet Handkerchief

It is finally here! My new sewing machine that can both wind bobbins and sew without tangling!
It also has decorative stitching and a needle threader. Fancy!

So many stitches

I decided to test it out by using the satin scallop edge to hem a hanky.
I had some old cotton fabric from a lovely quilt I made my mom a bajillion years ago.
Scallop edge, plus trimming
Then I pushed the pedal to the metal, so to speak, and zipped along. After cutting close to the scallop edge and removing extra fabric...
The finished pieces, folded oh-so-nicely!


Ta da!  Handkerchief!


05 June 2012

Cast on: Fingerless gloves/handwarmers

So, after finishing my dishcloth I was eager to start something new. I owed my mom a dishcloth, but I was waiting to hear what color she wanted to match the kitchen, so I wanted to wait.  I also want to make a lovely shawl or sweater or something but since mom is sending me some of my Oma's old needles, I wanted to wait and see what sizes I get (and maybe circular?)  And I didn't want to buy anything.
Nathan's hand warmers. Look! Waffle stitch on the right!

Fortunately, I had a bunch of yarn that was gifted to me from a friend when she moved out of the Cleveland area that has just been sitting in a cabinet, not being used.  I pulled out some Bernat Denim Style (cotton, acrylic blend) and searched ravelry for a beginning pattern that's knit on straight, size 7 needles that won't use too much yarn (I only have 1 skein).  Ta da! Knit flat and then sewed up later, I have a simple, free pattern to start on a set of hand warmers for Nathan.

I am doing okay, but a few kinks:
- This called to cast-on 36 stitches, but since Nathan has Man Hands I added an extra 4. I'm sort of concerned that this will be too big and it won't have enough stretchy part to fit. I think if this is the case, I'll just sew these up with an overlap and maybe add some decorative-type buttons.
- For the waffle stitch, I have to knit 2, purl 2 over and over along the same row. I am a little confused since the working yarn ends up on the wrong side when I switch from knit to purl (and vice versa)... but I've just been bringing the yarn over to the other side under my needles. I guess it looks ok? But I don't know if this is right.
- I don't know if I'll want to make a second one after I finish the first. Always a threat with me. :)

I'm really happy with how it looks so far. I have nice little "V"s on the front and cute little dashes on the back... and my waffle stitch at the bottom is so waffle-y!

Yay!